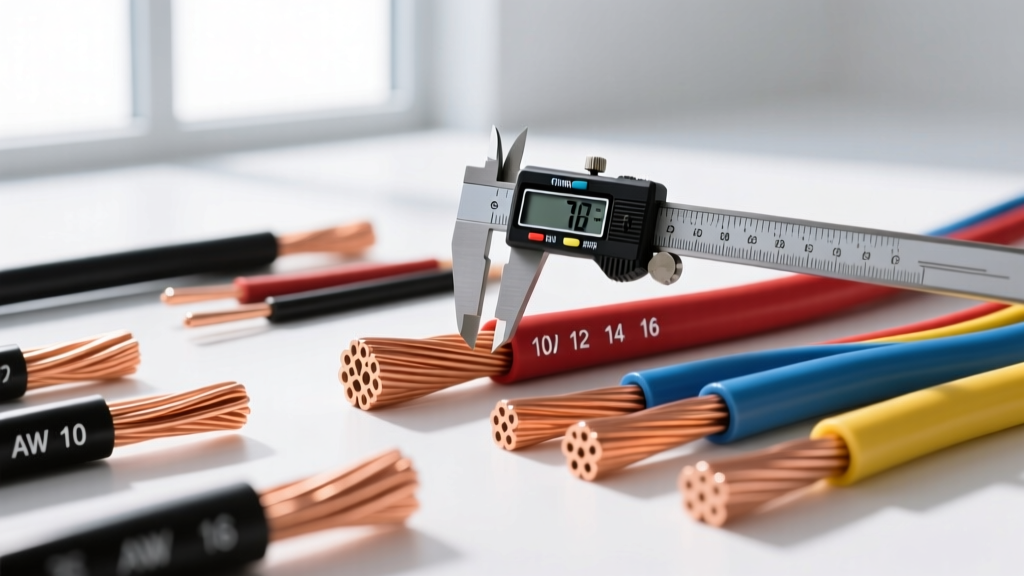
The Basics: Understanding Automotive Wire Gauges
When working on vehicle electrical systems, one of the most common questions beginners ask is, "how can i tell what gauge wire i have?" Identifying the correct wire size is critical for safety, preventing voltage drop, and ensuring your circuits do not overheat. In the automotive world, wire gauge refers to the cross-sectional area of the conductive copper inside the insulation, not the overall thickness of the wire itself.
Most domestic vehicles use the American Wire Gauge (AWG) system, where a lower number means a thicker wire (e.g., 4 AWG is much thicker than 18 AWG). However, many modern European and Asian imports use metric wire sizing (measured in square millimeters, or mm²). Before you can accurately identify your wire, you must understand that automotive wire is almost exclusively stranded rather than solid, allowing it to flex and withstand engine bay vibrations without snapping.
3 Proven Methods to Identify Your Wire Gauge
Method 1: The Digital Caliper Measurement (Most Accurate)
The most reliable way to determine your wire gauge is by measuring the bare copper conductor with a digital caliper. Do not measure the insulation. Modern automotive wires use thin-wall insulation, which can be highly deceptive.
- Strip the Wire: Use a precision wire stripper to remove about 1/2 inch of insulation from the end of the wire.
- Measure the Conductor: Gently close the caliper jaws on the bare copper strands. Do not compress the strands too tightly, or your reading will be artificially small.
- Account for Stranding: Because stranded wire has microscopic air gaps between the copper threads, the overall diameter of the bare bundle will be slightly larger than a solid wire of the same AWG. Compare your measurement to the AWG reference chart below.
Method 2: The Wire Gauge Stripper Tool Test
If you do not have digital calipers, a high-quality automotive wire crimping and stripping tool (like those from KnowEasy or Titan) features precisely machined stripping holes labeled with AWG sizes. Strip a small section of insulation, then insert the bare copper into the stripping holes starting from your best guess. The hole that cleanly strips the insulation without cutting into the copper strands perfectly matches your wire gauge. This is incredibly useful when working in tight spaces like a dash harness where calipers cannot fit.
Method 3: Decoding Factory Service Manuals (FSM)
Sometimes, the wire is buried deep inside a loom, and stripping it isn't an option. In this case, you can identify the gauge by tracing the wire color code in the vehicle's Factory Service Manual. For example, in many GM and Ford wiring diagrams, the main power feed to a fuel pump relay might be documented as a 12 AWG Pink (PNK) wire, while the ECU trigger signal is a 20 AWG Dark Green/White (DK GRN/WHT) wire. Always verify against the specific year, make, and model, as harness revisions occur frequently.
Automotive AWG Wire Gauge Reference Chart
Use this chart to match your caliper measurements to standard AWG sizes and their common automotive applications. Ampacity ratings listed are for chassis wiring (short runs in high-heat environments like engine bays), which differ from power transmission ratings.
| AWG Size | Conductor Diameter (in) | Conductor Diameter (mm) | Max Amps (Chassis) | Common Automotive Application |
|---|---|---|---|---|
| 22 | 0.0253 | 0.64 | 7A | ECU sensors, CAN bus lines, airbag clock springs |
| 20 | 0.0320 | 0.81 | 11A | O2 sensor heaters, low-current LED markers |
| 18 | 0.0403 | 1.02 | 16A | Fuel injectors, tail lights, horn relays |
| 16 | 0.0508 | 1.29 | 22A | Interior lighting, radio power, power locks |
| 14 | 0.0641 | 1.63 | 32A | Headlights, power windows, blower motors |
| 12 | 0.0808 | 2.05 | 41A | Amplifiers, high-draw cooling fans, trailer brakes |
| 10 | 0.1019 | 2.59 | 55A | High-power off-road light bars, winch controls |
| 8 | 0.1285 | 3.26 | 73A | Alternator charging lines, EV battery management |
| 4 | 0.2043 | 5.19 | 125A | Starter motor, main battery-to-fuse-block feeds |
Metric vs. AWG: What If My Car is Imported?
If you are working on a BMW, Audi, Toyota, or Honda, you will likely encounter metric wire. Metric wire is sized by its exact cross-sectional area in square millimeters (mm²). You can identify metric wire by looking for printed markings on the insulation (e.g., "FLR-X 0.75" or "ISO 6722 1.5").
| Metric Size (mm²) | Closest AWG Equivalent | Typical Use Case |
|---|---|---|
| 0.35 mm² | 22 AWG | CAN bus, low-current sensor signals |
| 0.50 mm² | 20 AWG | Instrument cluster, ECU data lines |
| 0.75 mm² | 18 AWG | Interior switches, low-draw lighting |
| 1.00 mm² | 16 AWG | Wipers, seat heaters, radio harnesses |
| 1.50 mm² | 14 AWG | Fuel pumps, ABS module power feeds |
| 2.50 mm² | 12 AWG | Headlight high beams, accessory sockets |
| 4.00 mm² | 10 AWG | Main ignition feeds, high-current relays |
Understanding Automotive Wire Insulation (SAE J1128)
When figuring out how to tell what gauge wire you have, it is vital to understand that not all insulation is created equal. According to the SAE J1128 Standard, automotive wire is categorized by its insulation thickness and temperature rating. The three most common types are:
- GXL (General Cross-Linked): The standard for most modern engine bays. Rated for 125°C. It has a thinner wall than older PVC wires.
- TXL (Thin Cross-Linked): Even thinner insulation, used where weight and space are at a premium (like inside tight dash harnesses). Rated for 125°C.
- SXL (Special Cross-Linked): Thicker insulation for high-heat, high-abrasion areas. Rated for 125°C.
Warning: Because TXL and GXL wires have very thin insulation, an 18 AWG TXL wire might look visually identical to a 16 AWG standard primary wire. This is why measuring the bare copper conductor is the only 100% foolproof method.
Real-World Troubleshooting: When Wire Gauge Fails
Using the wrong wire gauge is a leading cause of automotive electrical fires and component failure. Let's look at a common real-world scenario involving a voltage drop and melted connectors.
The Scenario: The Melted Metri-Pack Connector
An owner installs a 40-amp off-road LED light bar. To save money, they use leftover 14 AWG speaker wire and route it through a standard 30A Bosch relay, terminating the connections into a Delphi Weather-Pack or Metri-Pack 2.8 connector pigtail.
The Failure Mode
- Over-Ampacity: 14 AWG wire is rated for roughly 32A in an engine bay environment. Pushing 40A through it causes the copper to heat up significantly.
- Resistance at the Crimp: The heat travels down the copper strands to the metal terminal inside the plastic Metri-Pack connector.
- Insulation Melt: The PVC insulation on the speaker wire (which is not cross-linked like GXL) begins to melt and flow into the connector cavity.
- Voltage Drop: As the plastic deforms, the terminal loses tension. This creates a high-resistance connection, dropping the voltage reaching the light bar from 13.8V down to 10.5V, causing the lights to flicker and dim.
The Fix: Always match the wire gauge to the circuit's maximum amperage, and add a 20% safety buffer. For a 40A light bar, use 10 AWG GXL wire, a 50A heavy-duty relay, and appropriately sized heat-shrink ring terminals. For more on diagnosing these issues, AutoShop 101 offers excellent foundational guides on using a multimeter to test for voltage drop across suspected undersized circuits.
Summary Checklist for Beginners
- Always strip the wire and measure the bare copper, never the insulation.
- Use a digital caliper for the most accurate AWG or metric identification.
- Refer to the vehicle's wiring diagram to confirm wire colors and circuit purposes.
- Ensure your replacement wire meets SAE J1128 specifications (GXL or TXL) for engine bay use.
- Never use solid-core household wire (THHN/Romex) in a vehicle; it will snap from vibration.