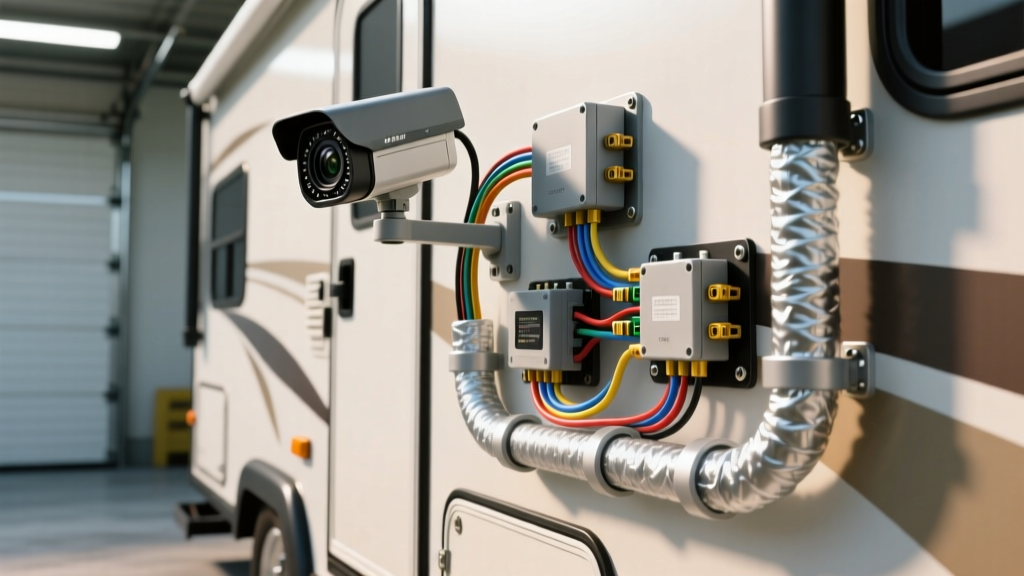
The Reality of RV and Overland Nest Exterior Camera Installation
Integrating smart home security hardware into mobile automotive platforms has become a staple in modern RV, camper van, and overland truck builds. A nest exterior camera installation on a recreational vehicle provides 360-degree campsite surveillance, trailer hitch monitoring, and remote security access via cellular hotspots. However, the Nest Cam (Wired, Outdoor) is engineered for residential 120V AC outlets or standard 5V DC USB-C wall adapters. It does not natively interface with a vehicle's 12V DC chassis system.
To execute a reliable mobile integration, automotive electricians must step down the vehicle's 14.4V alternator output to a stable 5V 3A DC supply, route weatherproof harnesses through the vehicle firewall, and manage voltage drop over long wheelbase runs. This guide provides a comprehensive cost and tool requirements analysis, alongside the technical wiring schematics necessary for a safe, SAE-compliant installation.
Cost Breakdown: Hardware, Converters, and Wiring Materials
Budgeting for a mobile camera integration extends far beyond the retail price of the camera itself. Automotive-grade wiring, over-current protection, and DC-DC conversion hardware are mandatory to prevent electrical fires and ensure the camera survives the harsh vibration and voltage spikes inherent to vehicle alternators. Below is an itemized cost analysis for a single-camera, 12V-to-5V DC-DC integration.
| Component | Automotive Specification | Est. Cost (USD) |
|---|---|---|
| Nest Cam (Outdoor, Wired) | IP65 Rated, 5V DC / 120V AC Input | $179.99 |
| DC-DC Buck Converter | 12V-24V Input to 5V 3A Output (USB-C) | $28.50 |
| Primary Wire (SAE J1128) | 14 AWG, Red/Black Duplex, 600V Insulation | $18.00 |
| Weatherproof Connectors | Deutsch DT 2-Pin with Wedgelocks | $14.00 |
| Inline Fuse Holder & Fuse | ATO Blade Holder, 5A Low-Profile Fuse | $9.50 |
| ISO Mini Relay & Socket | Bosch 5-Pin 12V 30A Relay (Ignition Switch) | $12.00 |
| Split Loom & Tesa Tape | 1/4" Corrugated Loom & Fleece Harness Tape | $16.00 |
| Total Estimated Hardware Cost | $277.99 |
Note: Utilizing a 120V AC inverter to power the camera's stock wall adapter is highly discouraged. Inverters introduce massive phantom draws, inefficiencies, and alternator whine into the camera's sensitive audio/video sensors. A dedicated DC-DC buck converter is the only professional-grade solution.
Essential Tool Requirements for 12V DC Integration
Standard household electrical tools will fail in automotive environments. Vibration and thermal cycling require specialized crimping and weatherproofing tools. The following toolkit is mandatory for a professional-grade nest exterior camera installation on a vehicle chassis.
Crimping, Routing, and Weatherproofing Tools
- Deutsch-Specific Crimper: Standard electrical crimpers will deform Deutsch solid-machined pins. Use an IWISS or equivalent HDP20 series crimping tool to ensure the wire barrel and insulation support crimps meet pull-force specifications.
- Precision Wire Strippers: Knipex Multi-Strip 10 AWG. Essential for stripping 14 AWG SAE wire without nicking the copper strands, which creates resistance hotspots.
- True RMS Multimeter: Fluke 115 or equivalent. Required to measure voltage drop across the 14 AWG run. A standard multimeter may miss the AC ripple generated by the vehicle's alternator.
- Adhesive-Lined Marine Heat Shrink: 3M dual-wall polyolefin. The inner meltable adhesive layer creates a watertight seal against the wire insulation, preventing capillary action from drawing moisture into the harness.
- Hot Air Rework Station: Provides even, controlled heat for shrinking marine-grade tubing without scorching the SAE wire insulation.
- Firewall Grommet Punch: For cleanly piercing the vehicle's rubber firewall boots without tearing the surrounding seal, which could lead to carbon monoxide or water ingress into the cabin.
Technical Wiring Diagram: 12V Chassis to 5V USB-C
The wiring architecture for this installation utilizes an ignition-switched relay to ensure the camera and DC-DC converter do not drain the vehicle's starter battery when the engine is off. The system draws power directly from the battery or a dedicated auxiliary bus bar, protected by an ATO fuse within 18 inches of the power source, in accordance with ABYC E-11 Electrical Systems Standards for mobile DC systems.
Pinout and Wire Color Standards (SAE J1128)
Adhering to SAE J1128 Low Tension Primary Cable Standards ensures future technicians can safely diagnose your harness. The following wire color codes and pin configurations must be used for the ISO mini relay and DC-DC converter integration:
- Pin 30 (Common / 12V+ Input): 14 AWG Red wire from the battery positive terminal, passing through a 5A ATO inline fuse.
- Pin 86 (Coil + / Ignition Source): 18 AWG Red wire tapped into an ignition-switched 12V+ circuit (e.g., cigarette lighter or upfitter switch).
- Pin 85 (Coil - / Ground): 18 AWG Black wire terminating at a dedicated chassis ground point using a star washer and ring terminal.
- Pin 87 (Normally Open / Load): 14 AWG Red wire feeding the positive input of the DC-DC Buck Converter.
- Pin 87a (Normally Closed): Unused. Cap and heat-shrink to prevent short circuits.
- DC-DC Ground Input: 14 AWG Black wire from the converter negative input to the chassis ground bus bar.
Step-Down Converter Specifications
The Nest Cam requires a stable 5V 3A (15W) input via USB-C. The DC-DC buck converter must be rated for a minimum continuous output of 3A, with an input voltage tolerance of 9V to 16V DC to accommodate engine cranking voltage sags and alternator load-dump spikes up to 40V. Ensure the converter features built-in over-current, over-voltage, and thermal shutdown protection.
Routing, Weatherproofing, and Exterior Penetration
Routing the harness from the cabin or engine bay to the exterior roofline or rear bumper requires strict adherence to NFPA 70 / NEC Article 551 (Recreational Vehicles) guidelines for low-voltage penetrations. When passing through the vehicle's metal skin, use a rubber grommet and coat the wire in dielectric silicone grease to prevent chafing.
For the exterior pigtail connection to the Nest Cam, never use standard butt-splice crimps. The vibration of highway driving will cause metal fatigue and eventual failure. Instead, use a Deutsch DT 2-pin connector housed inside a silicone protective boot. Apply dielectric grease to the pins before mating, and secure the secondary wedge locks to prevent the pins from backing out under thermal expansion.
Common Failure Modes in Mobile Camera Installations
Even experienced DIYers encounter specific failure modes when adapting residential tech for automotive use. Understanding these real-world issues will save hours of troubleshooting.
1. Voltage Drop and Reboot Loops
Symptom: The camera boots up, records for three minutes, then restarts continuously.
Cause: Using 18 AWG wire for a 20-foot run to the rear of a Sprinter van or RV. Under a 2A load, 18 AWG wire experiences a voltage drop of nearly 1.3V over 40 feet (round trip). The DC-DC converter receives less than 11V, causing its internal protection circuits to throttle or shut down.
Fix: Always use a minimum of 14 AWG wire for primary trunk lines exceeding 10 feet. Measure voltage at the converter input while the camera is actively streaming to verify it remains above 12.0V.
2. Alternator Whine and Video Artifacting
Symptom: A high-pitched buzzing in the camera's audio feed, or horizontal rolling bars in the night-vision video.
Cause: Ground loops created by daisy-chaining the camera's ground wire to a shared chassis point that also serves high-draw accessories like LED light bars or inverter banks.
Fix: Run a dedicated 14 AWG ground wire back to a centralized, isolated ground bus bar tied directly to the negative battery terminal. Sand the chassis mounting point down to bare, shiny metal before securing the ring terminal with a star washer and applying anti-corrosion compound.
3. Parasitic Draw from Inverter Use
Symptom: Vehicle starter battery is dead after two days of boondocking.
Cause: Wiring the camera to a 120V AC inverter. Even when the camera is in standby, the inverter's internal transformer draws 0.5A to 1.5A continuously from the 12V battery bank.
Fix: Eliminate the inverter entirely. The DC-DC buck converter method described above draws less than 0.02A in standby mode, preserving the vehicle's battery bank for extended off-grid camping.